
To Capture The Moon...
- zode03030
- Mar 2, 2024
- 6 min read
Updated: Apr 12, 2024
Moonlight drowns out all but the brightest stars. -J.R.R. Tolkien

Getting that picture perfect image of the moon is a goal for many photographers. If you've had trouble getting the photo you want, you have come to the right place. In this post I will discuss what equipment you need and what settings to use for the different moon phases, as well as provide some tips on getting a dramatic and awe inspiring picture. I go over quite a bit of info in this post, so if you just want the settings I will have those summarized at the bottom. I'm guilty of skipping down to the recipe and not reading the article from time to time, so I get it.
Equipment
In order to take a proper moon picture, the most important piece of equipment you will need is a camera capable of shooting in manual mode. If you have ever tried to take a picture of the moon in the auto setting then you likely got something like this:

A bright, blank orb. Why does this happen? Well, when your camera is in auto mode, it will try and use settings that will balance your light and dark to be as close to 50/50 as possible. In doing this, your camera over exposes, or "blows out," your moon in an attempt to balance the dark sky.
Switching to manual mode allows you to set your exposure time, aperture, and ISO so that you get the correct exposure for the moon and ignoring the black background. We will cover the correct settings soon, but first, the next item you need is...

A zoom lens or a telephoto prime lens. Does this mean you need a $2500, 500mm super telephoto lens? No, thankfully that is not a requirement to get a decent moon pic. I have personally found a lens with a focal length of 200mm or more will work to get an acceptable image.
A zoom lens (as opposed to a fixed, prime lens) is especially great if you decide you might want to include a foreground element since you can adjust your focal length to ensure you get exactly the composition you had in mind. Again, we will cover the settings very soon. You just need one last piece of equipment to get a great moon shot, and that item is...

A tripod! Why do you need a tripod? Well, the settings required to take a moon photo (almost there!) are such that it is very easy to lose out on detail because you are hand holding your camera.
A tripod will allow you to set a shutter timer (or use a remote) and be completely hands-off by the time the photo is being taken. With moon photos, even tiny vibrations can ruin the details you are chasing after.
Again, this does not require spending $500 to $1000 on a professional level tripod. So long as you aren't trying to take your picture in high winds, you likely don't need a super beefy tripod. I recommend a $60-$100 tripod with ball head. This is enough to get a beginner or intermediate going and have a fairly solid tripod.
OK. Finally. What Settings Do You Use For Moon Photos?
The settings you should use depend upon the phase of the moon and your camera and lens. I will give you the starting point for each phase and you should then adjust based upon what gives you the color and composition you want.
Full Moon: ISO 200* / F11-F14 / Shutter Speed of 1/200 of a second.
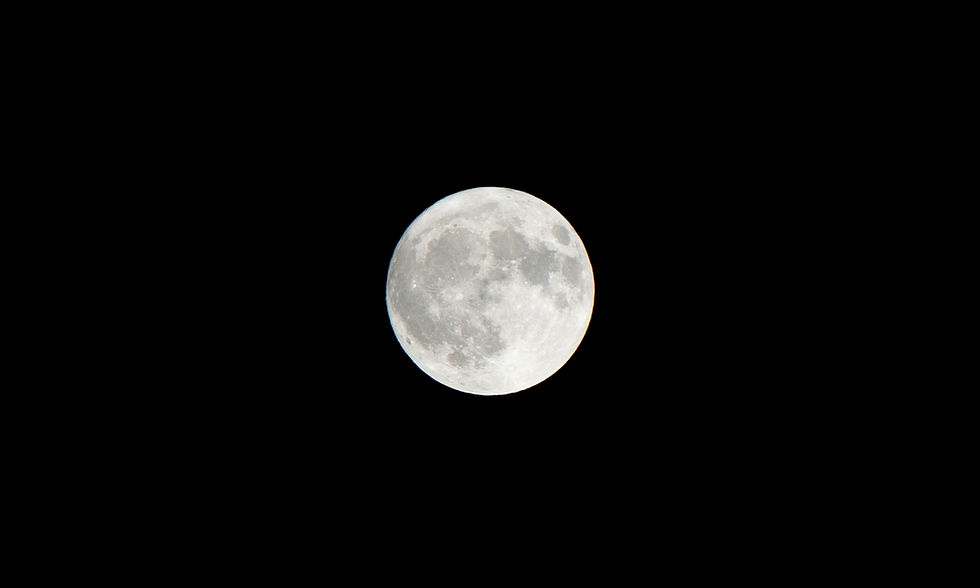
If you are wanting that perfect full moon pic, start with the settings above and adjust until you get the exposure and detail you want. Keep one thing in mind: full moon pics will often look like they are lacking depth. The picture above looks flat and almost boring. This is because, unless you have a telescope to grab every little detail, the surface being directly lit up removes all but the smallest shadows. This makes the full moon look somewhat two dimensional. Compare to this 3/4 waxing:
The craters on the edge of the dark side stand out and give extra umph to your picture because the sun is shining across them instead of directly into them. So to get a more dramatic photo, consider capturing the moon at slightly less than full so you get that extra detail along the dark edge.
3/4 Moon: ISO 200 / F11-14 / Shutter Speed of 1/100 of a second.
For a 3/4 moon, the settings are close to the same as full, but you may need to drop down to a 1/100 shutter speed and/or stick to the lower end of the aperture setting and use F11.
1/2 Moon: ISO 400 / F6.3 / Shutter Speed of 1/25 of a second.
For a 1/2 moon this is the first time I increased ISO. My camera, despite being 10 years old, still takes great pics with no extra noise at ISO 400, and my telephoto lens has a minimum aperture of F6.3 at 300mm focal length, so to get full brightness at half moon I had to tweak ISO slightly. This produces a photo like this:

The moon is tilted because a 1/2 waxing is already getting low in the sky by the time it is fully dark. I could have adjusted my camera or rotated it using editing software, but I think the tilt makes this picture more interesting.
1/4 Moon: ISO 400+ / F6.3 / Shutter Speed of 1/15 of a second.
Here's where moon photography starts getting trickier. If you happen to have a "fast" (low F number) telephoto lens, then you will have an easier time with this, but with most zoom lenses you are going to have a minimum F stop of around 6.3. This means upping that ISO again and shooting at the longest shutter speed you can without blur, which will likely be around 1/15. The difference in brightness between a full and a 1/4 is very stark.

Additional Tips
White Balance: If you are shooting in RAW and have editing software, use auto white balance as you can always change the "temperature" (cooler blue to warmer red) later. If you are shooting JPEG, start in auto white and review your first photo on the back screen. Does it match with what you are seeing? if not, try daylight next, as a full moon is very bright. Keep trying different white settings until you are happy.
Avoid High ISO: No matter the phase, try to get the picture you want by adjusting the aperture and shutter speed. Hold off on adjusting your ISO unless you simply cannot get what you want from the other two settings. The reason for this is that ISO is a compensation for lack of light reaching your sensor and therefore artificially lightens the photo, resulting in the noise (created by lack of light) showing through. If you are getting noise in your moon photos, try to reduce ISO and increase how long your shutter is open. After all, this is why you have a tripod! That being said please make sure to keep a...
1/15 Shutter Speed Minimum: The moon moves relatively quickly through the sky when compared to stars, so a minimum shutter speed of 1/15 is needed to prevent blur. Once you have reached 1/15 of a second with the largest aperture (lowest F number) this is when you start increasing your ISO.
Timing: One thing you need to consider when planning to shoot the moon is timing. 1/4 waning is going to rise very early in the morning, meaning you either need to stay up super late or get up very early. A 1/4 waxing rises before sunset and will be very low once the sky is dark enough to get a "moon-at-night" picture. Figure out what phase you want to shoot and then look up a moon phase calendar to determine when you are going to need to be ready to shoot. Winter is actually the best time of year to take moon photos as the sun rises so late and sets so early.
Adding Interest To Your Moon Photos
So now you have a full moon pic, a half moon pic, maybe you stayed up in the middle of winter to get that elusive sliver of a moon. Where do you go from here? Well, now would be a great time to add a foreground, try to get some clouds around your moon, or even combine your different moon phase shots into one composite. To get the best versions of any of these can require editing software, and that is a discussion to fill multiple other posts! But, if you already know about focus stacking and compositing, give it a try. For now I will leave you with this photo I took where I have a deliberately blurry foreground. Personally I like the branches blurry, as they give an impression of looking past them to the moon.


Settings Summary:
Full Moon: ISO 200* / F11-F14 / Shutter Speed of 1/200 of a second.
3/4 Moon: ISO 200 / F11-14 / Shutter Speed of 1/100 of a second.
1/2 Moon: ISO 400 / F6.3 / Shutter Speed of 1/25 of a second.
1/4 Moon: ISO 400+ / F6.3 / Shutter Speed of 1/15 of a second.


Comments